README
Open on GitHub ↗Settings
Add a settings window to your macOS app in minutes
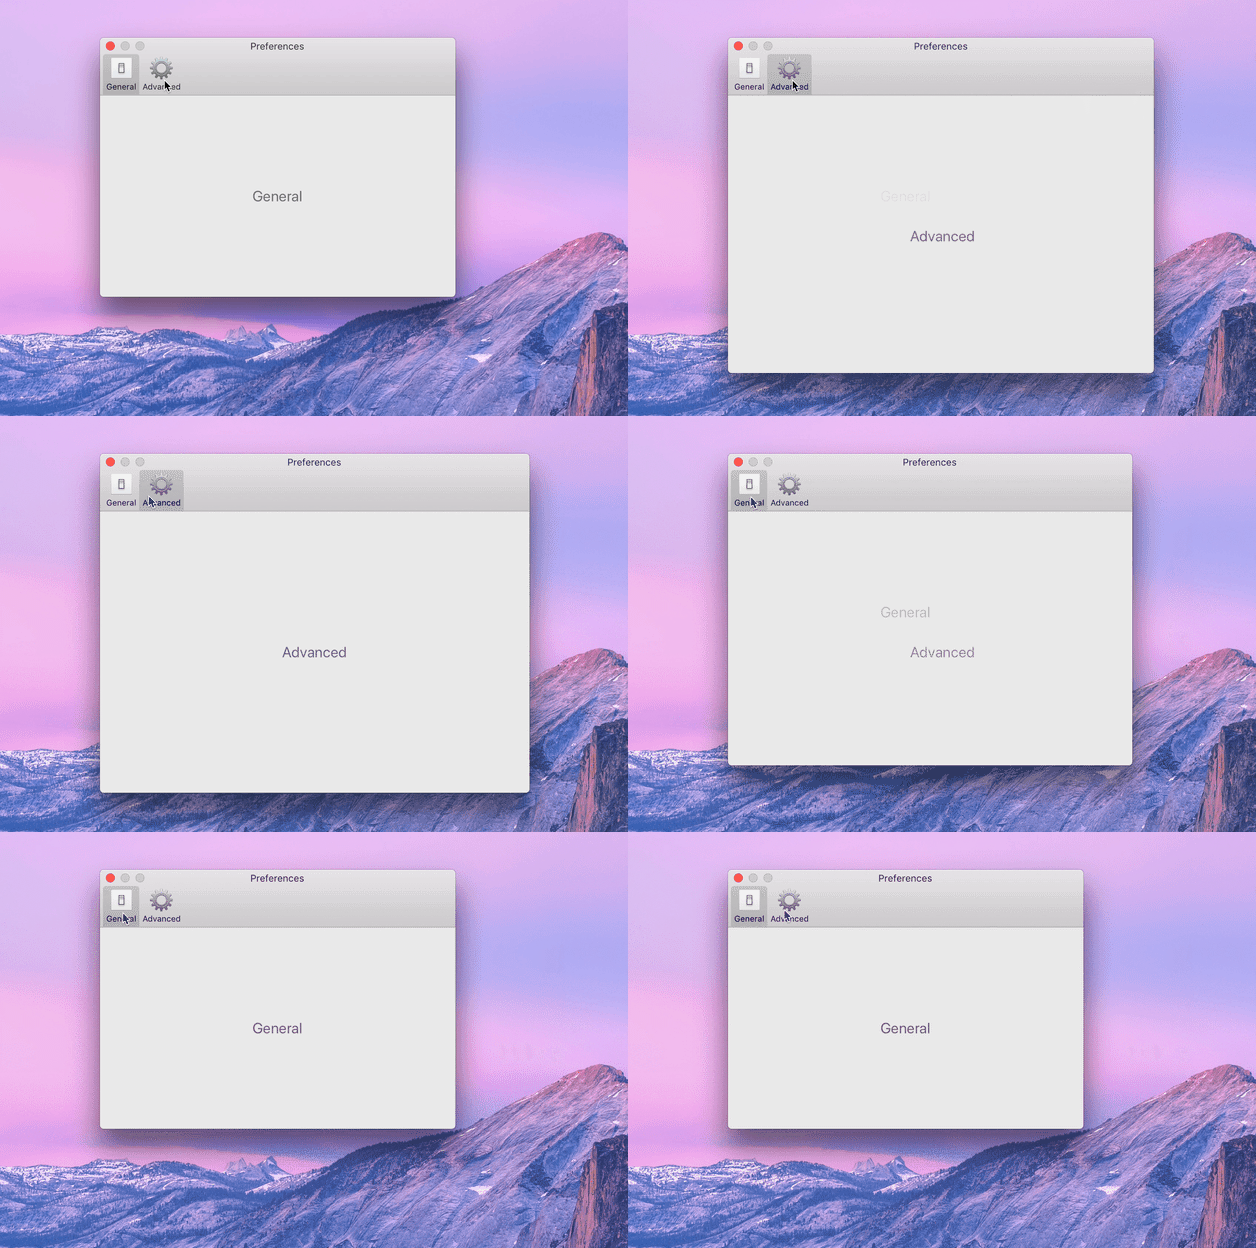
Just pass in some view controllers and this package will take care of the rest. Built-in SwiftUI support.
This package is compatible with macOS 13 and automatically uses Settings instead of Preferences in the window title on macOS 13 and later.
This project was previously known as Preferences.
Requirements
macOS 10.13 and later.
Install
Add https://github.com/sindresorhus/Settings in the “Swift Package Manager” tab in Xcode.
Usage
Run the Example Xcode project to try a live example (requires macOS 11 or later).
First, create some settings pane identifiers:
import Settings

extension Settings.PaneIdentifier {
	static let general = Self("general")
	static let advanced = Self("advanced")
}
Second, create a couple of view controllers for the settings panes you want. The only difference from implementing a normal view controller is that you have to add the SettingsPane protocol and implement the paneIdentifier, toolbarItemTitle, and toolbarItemIcon properties, as shown below. You can leave out toolbarItemIcon if you're using the .segmentedControl style.
GeneralSettingsViewController.swift
import Cocoa
import Settings

final class GeneralSettingsViewController: NSViewController, SettingsPane {
	let paneIdentifier = Settings.PaneIdentifier.general
	let paneTitle = "General"
	let toolbarItemIcon = NSImage(systemSymbolName: "gearshape", accessibilityDescription: "General settings")!

	override var nibName: NSNib.Name? { "GeneralSettingsViewController" }

	override func viewDidLoad() {
		super.viewDidLoad()

		// Setup stuff here
	}
}
Note: If you need to support macOS versions older than macOS 11, you have to add a fallback for the toolbarItemIcon.
AdvancedSettingsViewController.swift
import Cocoa
import Settings

final class AdvancedSettingsViewController: NSViewController, SettingsPane {
	let paneIdentifier = Settings.PaneIdentifier.advanced
	let paneTitle = "Advanced"
	let toolbarItemIcon = NSImage(systemSymbolName: "gearshape.2", accessibilityDescription: "Advanced settings")!

	override var nibName: NSNib.Name? { "AdvancedSettingsViewController" }

	override func viewDidLoad() {
		super.viewDidLoad()

		// Setup stuff here
	}
}
If you need to respond actions indirectly, the settings window controller will forward responder chain actions to the active pane if it responds to that selector.
final class AdvancedSettingsViewController: NSViewController, SettingsPane {
	@IBOutlet private var fontLabel: NSTextField!
	private var selectedFont = NSFont.systemFont(ofSize: 14)

	@IBAction private func changeFont(_ sender: NSFontManager) {
		font = sender.convert(font)
	}
}
In the AppDelegate, initialize a new SettingsWindowController and pass it the view controllers. Then add an action outlet for the Settings… menu item to show the settings window.
AppDelegate.swift
import Cocoa
import Settings

@main
final class AppDelegate: NSObject, NSApplicationDelegate {
	@IBOutlet private var window: NSWindow!

	private lazy var settingsWindowController = SettingsWindowController(
		panes: [
			GeneralSettingsViewController(),
			AdvancedSettingsViewController()
		]
	)

	func applicationDidFinishLaunching(_ notification: Notification) {}

	@IBAction
	func settingsMenuItemActionHandler(_ sender: NSMenuItem) {
		settingsWindowController.show()
	}
}
Settings Tab Styles
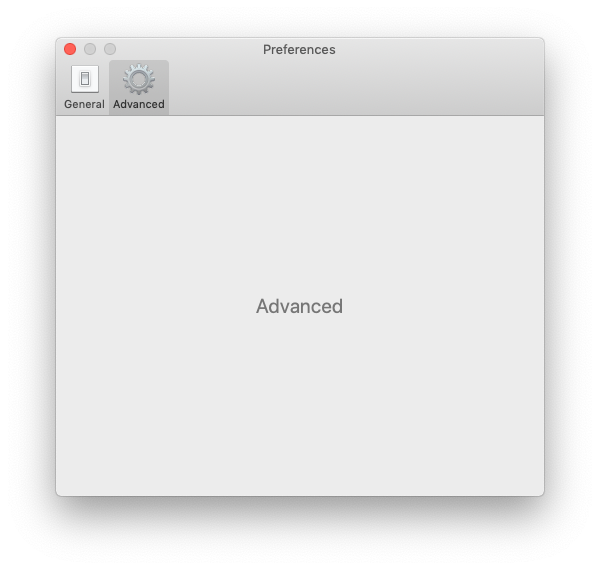
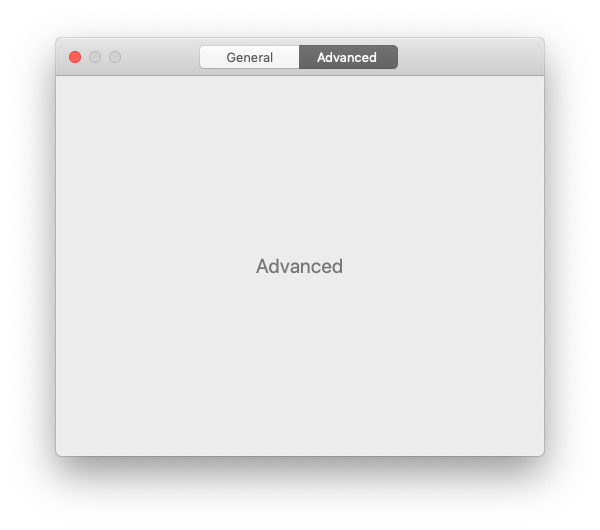
When you create the SettingsWindowController, you can choose between the NSToolbarItem-based style (default) and the NSSegmentedControl:
// …
private lazy var settingsWindowController = SettingsWindowController(
	panes: [
		GeneralSettingsViewController(),
		AdvancedSettingsViewController()
	],
	style: .segmentedControl
)
// …
.toolbarItem style:
.segmentedControl style:
API
public enum Settings {}

extension Settings {
	public enum Style {
		case toolbarItems
		case segmentedControl
	}
}

public protocol SettingsPane: NSViewController {
	var paneIdentifier: Settings.PaneIdentifier { get }
	var paneTitle: String { get }
	var toolbarItemIcon: NSImage { get } // Not required when using the .`segmentedControl` style
}

public final class SettingsWindowController: NSWindowController {
	init(
		panes: [SettingsPane],
		style: Settings.Style = .toolbarItems,
		animated: Bool = true,
		hidesToolbarForSingleItem: Bool = true
	)

	init(
		panes: [SettingsPaneConvertible],
		style: Settings.Style = .toolbarItems,
		animated: Bool = true,
		hidesToolbarForSingleItem: Bool = true
	)

	func show(pane: Settings.PaneIdentifier? = nil)
}
As with any NSWindowController, call NSWindowController#close() to close the settings window.
Recommendation
The easiest way to create the user interface within each pane is to use a NSGridView in Interface Builder. See the example project in this repo for a demo.
SwiftUI support
If your deployment target is macOS 10.15 or later, you can use the bundled SwiftUI components to create panes. Create a Settings.Pane (instead of SettingsPane when using AppKit) using your custom view and necessary toolbar information.
Run the Example target in the Xcode project in this repo to see a real-world example. The Accounts tab is in SwiftUI.
There are also some bundled convenience SwiftUI components, like Settings.Container and Settings.Section to automatically achieve similar alignment to AppKit's NSGridView. And also a .settiingDescription() view modifier to style text as a setting description.
Tip: The Defaults package makes it very easy to persist the settings.
struct CustomPane: View {
	var body: some View {
		Settings.Container(contentWidth: 450.0) {
			Settings.Section(title: "Section Title") {
				// Some view.
			}
			Settings.Section(label: {
				// Custom label aligned on the right side.
			}) {
				// Some view.
			}
			…
		}
	}
}
Then in the AppDelegate, initialize a new SettingsWindowController and pass it the pane views.
// …

private lazy var settingsWindowController = SettingsWindowController(
	panes: [
		Pane(
			 identifier: …,
			 title: …,
			 toolbarIcon: NSImage(…)
		) {
			CustomPane()
		},
		Pane(
			 identifier: …,
			 title: …,
			 toolbarIcon: NSImage(…)
		) {
			AnotherCustomPane()
		}
	]
)

// …
If you want to use SwiftUI panes alongside standard AppKit NSViewController's, instead wrap the pane views into Settings.PaneHostingController and pass them to SettingsWindowController as you would with standard panes.
let CustomViewSettingsPaneViewController: () -> SettingsPane = {
	let paneView = Settings.Pane(
		identifier: …,
		title: …,
		toolbarIcon: NSImage(…)
	) {
		// Your custom view (and modifiers if needed).
		CustomPane()
		//  .environmentObject(someSettingsManager)
	}

	return Settings.PaneHostingController(paneView: paneView)
}

// …

private lazy var settingsWindowController = SettingsWindowController(
	panes: [
		GeneralSettingsViewController(),
		AdvancedSettingsViewController(),
		CustomViewSettingsPaneViewController()
	],
	style: .segmentedControl
)

// …
Backwards compatibility
macOS 11 and later supports SF Symbols which can be conveniently used for the toolbar icons. If you need to support older macOS versions, you have to add a fallback. Apple recommends using the same icons even for older systems. The best way to achieve this is to export the relevant SF Symbols icons to images and add them to your Asset Catalog.
Known issues
The settings window doesn't show
This can happen when you are not using auto-layout or have not set a size for the view controller. You can fix this by either using auto-layout or setting an explicit size, for example, preferredContentSize in viewDidLoad(). We intend to fix this.
There are no animations on macOS 10.13 and earlier
The animated parameter of SettingsWindowController.init has no effect on macOS 10.13 or earlier as those versions don't support NSViewController.TransitionOptions.crossfade.
FAQ
How can I localize the window title?
The SettingsWindowController adheres to the macOS Human Interface Guidelines and uses this set of rules to determine the window title:
- Multiple settings panes: Uses the currently selected
paneTitleas the window title. Localize yourpaneTitles to get localized window titles. - Single settings pane: Sets the window title to
APPNAME Settings. The app name is obtained from your app's bundle. You can localize itsInfo.plistto customize the title. TheSettingspart is taken from the "Settings…" menu item, see #12. The order of lookup for the app name from your bundle:CFBundleDisplayNameCFBundleNameCFBundleExecutable- Fall back to
"<Unknown App Name>"to show you're missing some settings.
Why should I use this instead of just manually implementing it myself?
It can't be that hard right? Well, turns out it is:
- The recommended way is to implement it using storyboards. But storyboards... And if you want the segmented control style, you have to implement it programmatically, which is quite complex.
- Even Apple gets it wrong, a lot.
- You have to correctly handle window and tab restoration.
- The window title format depends on whether you have a single or multiple panes.
- It's difficult to get the transition animation right. A lot of apps have flaky animation between panes.
- You end up having to deal with a lot of gnarly auto-layout complexities.
How is it better than MASPreferences?
- Written in Swift. (No bridging header!)
- Swifty API using a protocol.
- Supports segmented control style tabs.
- SwiftUI support.
- Fully documented.
- Adheres to the macOS Human Interface Guidelines.
- The window title is automatically localized by using the system string.
Related
- Defaults - Swifty and modern UserDefaults
- LaunchAtLogin - Add "Launch at Login" functionality to your macOS app
- KeyboardShortcuts - Add user-customizable global keyboard shortcuts to your macOS app
- DockProgress - Show progress in your app's Dock icon
- More…
You might also like Sindre's apps.
Used in these apps
- TableFlip - Visual Markdown table editor by Christian Tietze
- The Archive - Note-taking app by Christian Tietze
- Word Counter - Measuring writer's productivity by Christian Tietze
- Medis - A Redis GUI by Zihua Li
- OK JSON - A scriptable JSON formatter by Francis Feng
- Menu Helper - A Finder Extension App by Kyle-Ye
Want to tell the world about your app that is using this package? Open a PR!